


· By 4
A New Life for Old Cards & Gift Wrap Scraps: DIY Gift Tags!
 The guide has 4 tag options – one large scalloped design with a matching lil’ guy, and one large basic tag with a smaller matching companion. A heads up: the basic tag is WAY easier to cut. That being said, I think the scalloped ones are (as they say out here in northern California) “hella” cute, so you do you when choosing your tag style, you do you.
Recycling Cards
This only works for folded cards that have writing on only one of the interior panes. If your friends are long winded like me, taking up every inch inside of their cards, then you’re S.O.L. on this one. But if you’ve got a spare half-a-card written on pretty patterned stationery, all you gotta do is:
The guide has 4 tag options – one large scalloped design with a matching lil’ guy, and one large basic tag with a smaller matching companion. A heads up: the basic tag is WAY easier to cut. That being said, I think the scalloped ones are (as they say out here in northern California) “hella” cute, so you do you when choosing your tag style, you do you.
Recycling Cards
This only works for folded cards that have writing on only one of the interior panes. If your friends are long winded like me, taking up every inch inside of their cards, then you’re S.O.L. on this one. But if you’ve got a spare half-a-card written on pretty patterned stationery, all you gotta do is:
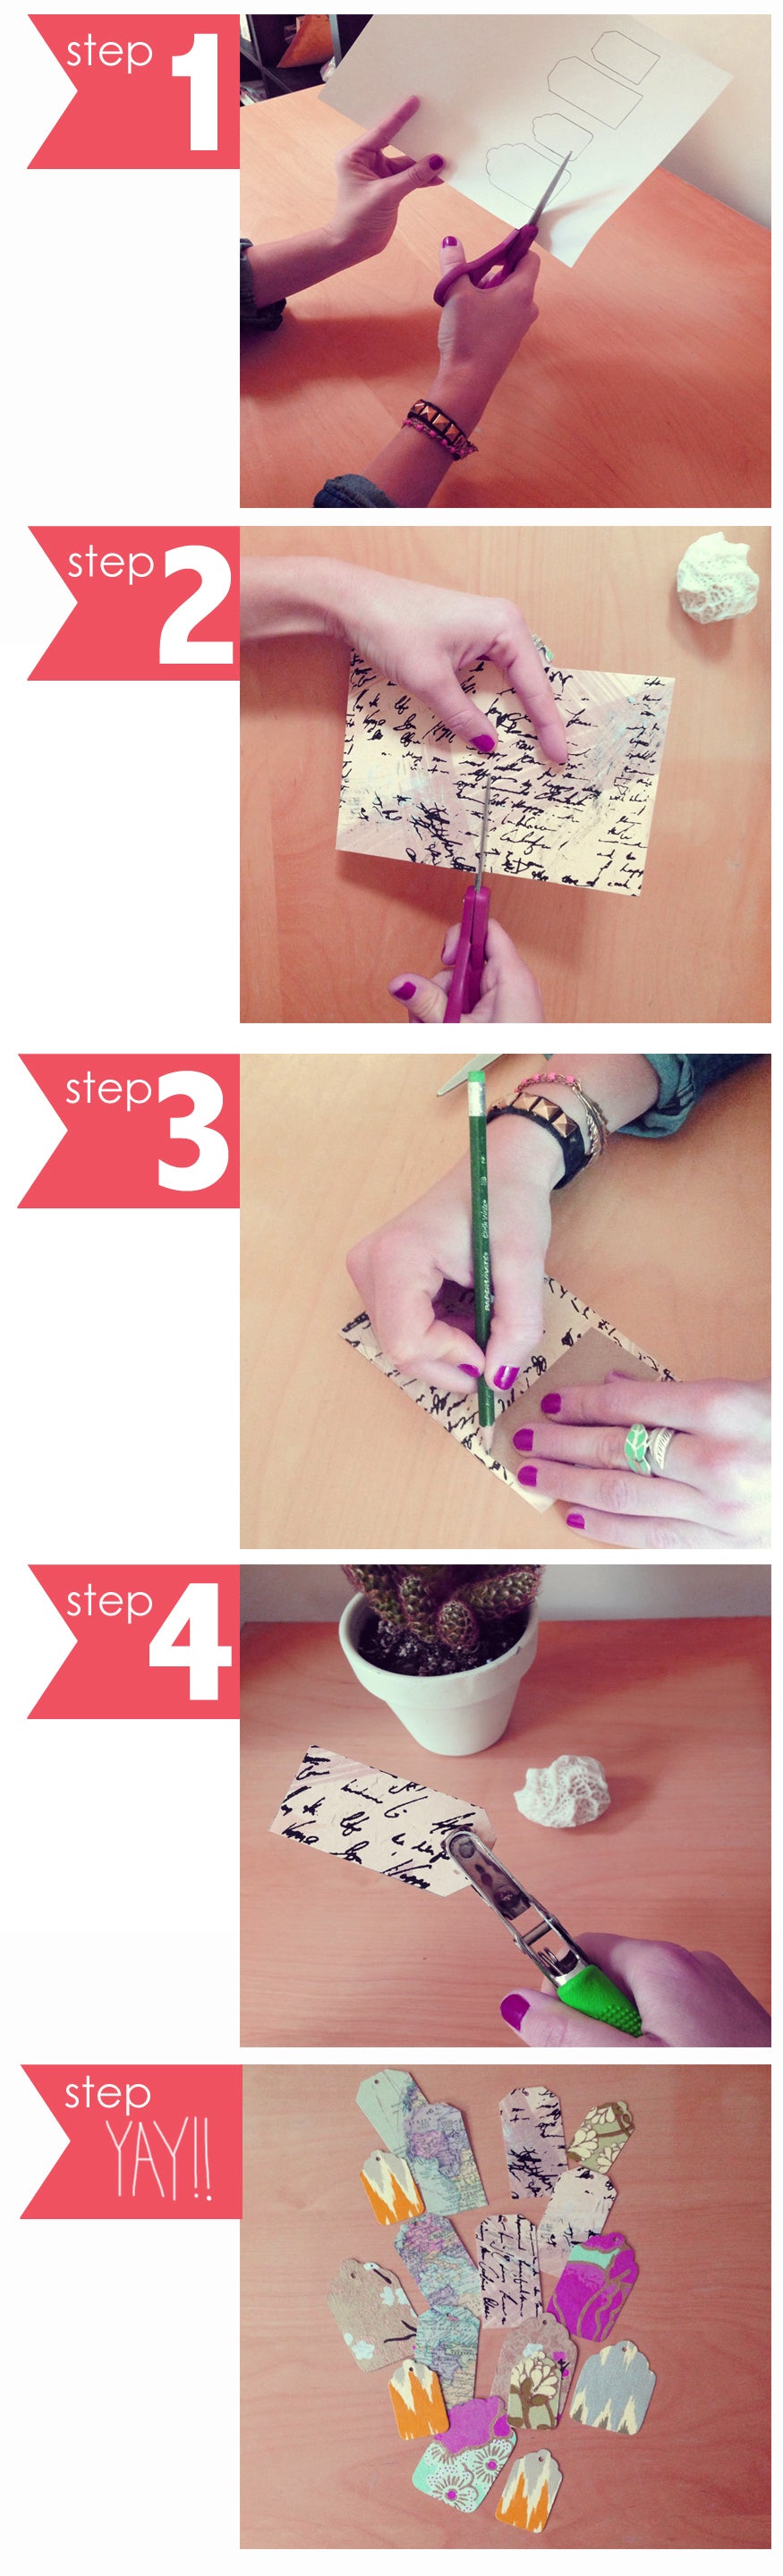
- Download, print, and cut out your tracing guide
- Chop your card in half and recycle the portion that was written on (or keep in in a box of memories, whatever you choose)
- Trace your tag design (most cards can make at least a few tags each)
- Cut, hole-punch, and thread some twine or string through the hole to affix the tag to a gift
 Recycling Gift Wrap
Turning gift wrap into gift tags has the same steps as recycling cards: trace, cut, hole-punch. But to keep your tags from being too flimsy, I use rubber cement to adhere the gift wrap to cardstock prior to tracing and cutting the tag – that way you’ve got a sturdy enough material from the beginning, and your final product will be that much better.
Recycling Gift Wrap
Turning gift wrap into gift tags has the same steps as recycling cards: trace, cut, hole-punch. But to keep your tags from being too flimsy, I use rubber cement to adhere the gift wrap to cardstock prior to tracing and cutting the tag – that way you’ve got a sturdy enough material from the beginning, and your final product will be that much better.
- Download, print, and cut out your tracing guide
- Select your wrapping paper sample. Place pattern side down, evenly distribute rubber cement, and place the cardstock on top. Apply pressure, smooth out any bubbles, and let it dry (I’m impatient, so it’s a miracle if I give it even 10 minutes and things usually turn out just fine)
- Trace your tag design (most cards can make at least a few tags each)
- Cut, hole-punch, and thread some twine or string through the hole to affix the tag to a gift