
· By 4
RPS DIY- Dip Dye Thumb Tacks
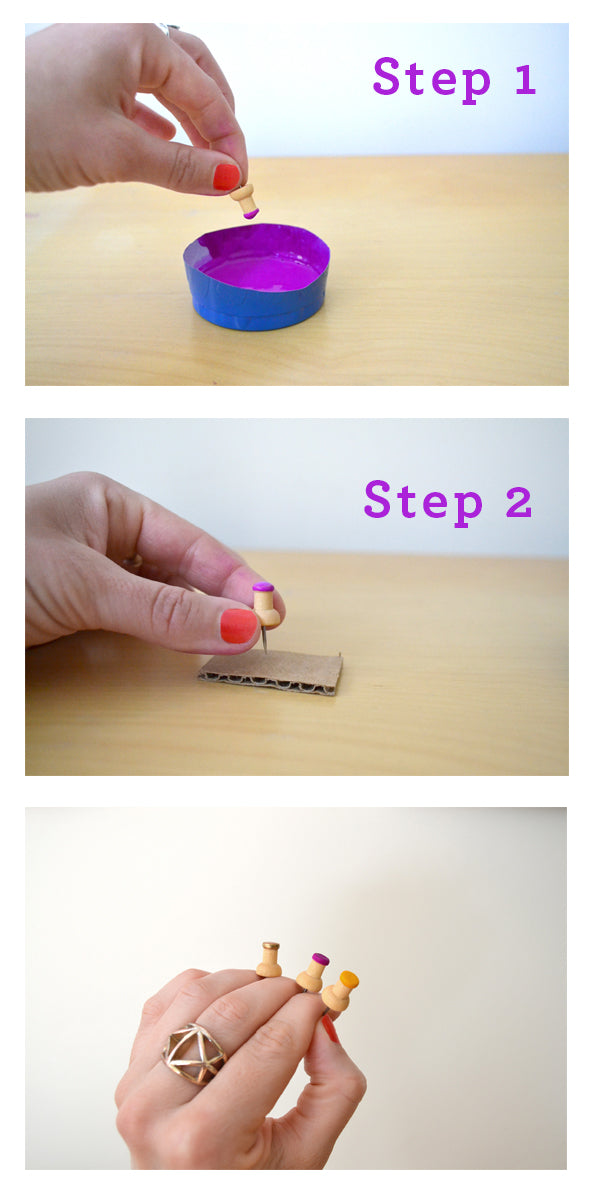
 Single Color For my first try, I decided to dip the top of each pin. Sounded simple enough. I cut down some old solo cups to hold the paint and started with the purple and yellow paints. (I used acrylic polymer, which requires some watering down). Hold the tack upside down, dip it in the paint and pin it in a piece of cardboard to dry. A few coats later and you’re done!
 To do the gold ones, I used metallic gold spray paint that I had on hand for other projects. I sprayed the paint in the cutout solo cup and then followed the same process. A note of caution – metallic colors via spray paint can be obnoxious to deal with – the paint layers separated in the cup, it had a tendency to bleed on the pins and some dried a little funky. I still ended up with a lot of pretty pins in the end – it was just a more painstaking process to get there.
Two Colors For the second round I wanted to make multi colored pins. The first step was to coat the entire pin in paint for the base layer. To accomplish this, first secure your thumb tack in a small square of cardboard – that way you’re no longer touching the tack and the entire thing can be coated when you dip it in the paint. You may want to touch up any spots where the paint coated too heavy or too light with a paintbrush – also check the underside of the push pin. Once the base layer is dry, you can dip the top portion for a two tone effect. WOO!
To do the gold ones, I used metallic gold spray paint that I had on hand for other projects. I sprayed the paint in the cutout solo cup and then followed the same process. A note of caution – metallic colors via spray paint can be obnoxious to deal with – the paint layers separated in the cup, it had a tendency to bleed on the pins and some dried a little funky. I still ended up with a lot of pretty pins in the end – it was just a more painstaking process to get there.
Two Colors For the second round I wanted to make multi colored pins. The first step was to coat the entire pin in paint for the base layer. To accomplish this, first secure your thumb tack in a small square of cardboard – that way you’re no longer touching the tack and the entire thing can be coated when you dip it in the paint. You may want to touch up any spots where the paint coated too heavy or too light with a paintbrush – also check the underside of the push pin. Once the base layer is dry, you can dip the top portion for a two tone effect. WOO!

